Remove Hardened Tartar Safely: Remove hardened tartar is a common goal for people who notice rough yellow deposits on their teeth. These deposits often sit near the gumline and feel gritty. Many people try aggressive brushing first. However, that method rarely works and can damage enamel.
Remove hardened tartar requires the right method and realistic expectations. Soft plaque can be brushed away. Hardened tartar removal is different because the deposit bonds tightly to enamel. Therefore, safe technique matters more than force.
In this guide, you will learn how to remove tartar safely, what you can try at home, and when professional help becomes necessary.
👉Check Dental Pro 7 availability for targeted plaque control support
What Is Hardened Tartar Exactly
Hardened tartar starts as plaque. Plaque is soft and sticky. If you do not remove it daily, minerals from saliva enter the layer. Then the film turns solid.
This hard deposit is tartar.
Hardened tartar:
sticks firmly to teeth
feels rough
traps bacteria
irritates gums
grows layer by layer
Because it is mineralized, normal brushing cannot break it apart easily.
Therefore, early plaque removal always works better than late tartar removal.
Where Hardened Tartar Builds Most Often
Hardened tartar removal is harder in certain areas. That is because mineral flow and brushing angles vary by location.
💡 You can also explore similar dental health supplements and oral care products on Amazon.
Check availability here →
Most common zones include:
Behind Lower Front Teeth
Saliva glands sit nearby. Minerals collect fast. As a result, tartar hardens quickly.
Along the Gumline
Many people brush the center of teeth only. Meanwhile, the gum edge stays dirty.
Between Teeth
Tight spaces protect plaque. Therefore tartar can grow unseen.
Around Dental Work
Fillings and crowns create edges. Deposits attach more easily there.
Knowing these zones helps you target your effort.
Remove Hardened Tartar at Home: What Actually Works
Hardened tartar removal at home is possible only for small deposits. Thick layers usually need professional tools. However, you can reduce early tartar and prevent growth.
Improve Brushing Angle First
Angle the brush toward the gumline at about 45 degrees. Use short circular strokes. This motion disrupts plaque that feeds tartar growth.
Do not scrub sideways with force. Instead, use gentle repeated motion.
Use Interdental Cleaning Daily
Floss or interdental brushes reach areas your toothbrush misses. Therefore they reduce hidden buildup.
Consistency matters more than speed.
Use Precision Mechanical Cleaning
Targeted plaque scraping tools made for home use can help with minor hardened edges. However, use them gently and slowly.
Work under bright light. Stop if gums bleed heavily.
Brush Before Sleeping Every Night
Night cleaning matters most. Bacteria multiply faster while you sleep. Therefore skipping night brushing increases tartar risk sharply.
What Does Not Remove Hardened Tartar
Many home tips promise fast tartar removal. Most do not work well. Some even harm enamel.
Avoid these methods:
Baking Soda Scrubbing
It may polish stains, but it does not remove bonded tartar. Overuse also wears enamel.
Lemon or Vinegar Rinses
Acids soften enamel first, not tartar. Therefore damage risk rises.
Salt Rubbing
Salt is abrasive. It irritates gums without removing mineral deposits.
Charcoal Powders
These can scratch enamel. They do not break tartar bonds.
Because tartar is mineralized, chemistry alone rarely removes it safely.
Signs Your Tartar Is Too Hard for Home Removal
Sometimes hardened tartar removal at home is not realistic. Watch for these signs.
You likely need professional scaling if:
deposits feel thick and raised
color looks dark yellow or brown
gums bleed often
breath stays bad
teeth feel rough after brushing
In these cases, dental tools work faster and safer.
Early professional cleaning prevents gum damage.
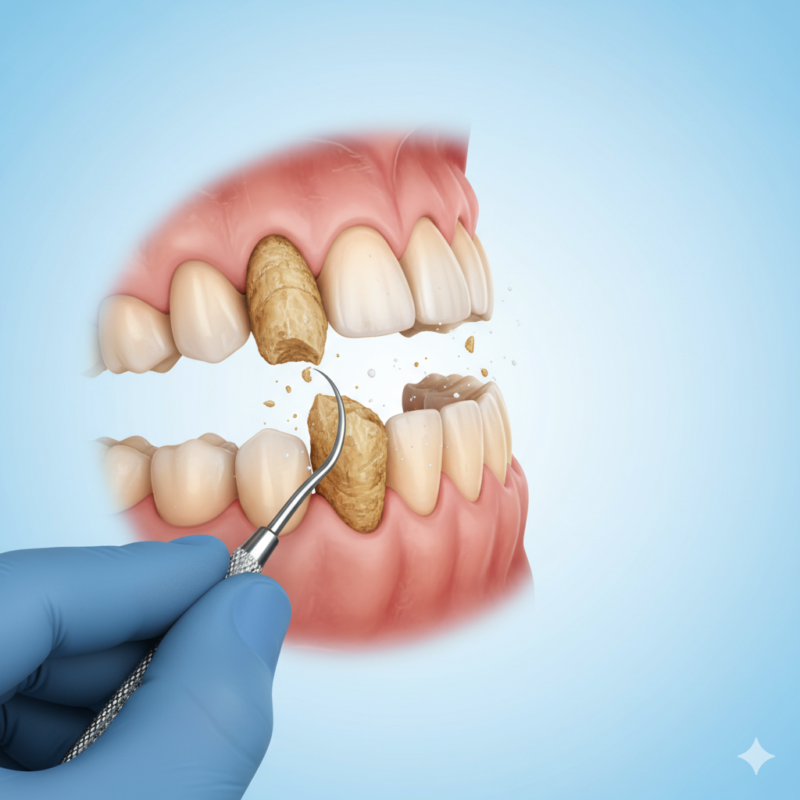
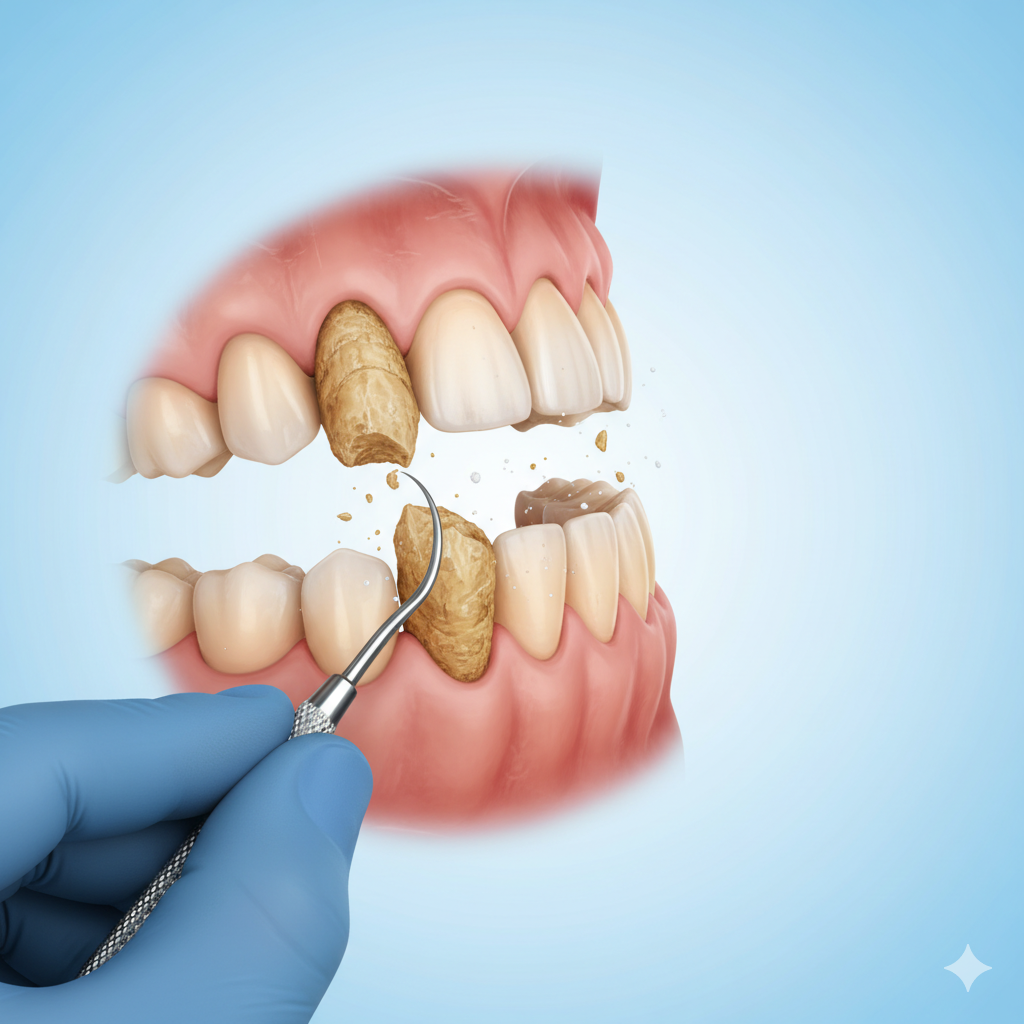
How Dentists Remove Hardened Tartar
Understanding professional tartar removal helps set expectations.
Dentists use:
manual scalers
ultrasonic vibration tools
water-cooled tips
fine polishing tools
These instruments break mineral bonds safely. Meanwhile, they protect enamel.
The process is called scaling.
After scaling, teeth feel smooth again. That smoothness slows future buildup.
Remove Hardened Tartar Safely: How to Prevent Tartar After Removal
Remove hardened tartar once, then focus on prevention. That is the smart strategy.
Clean the Gumline Daily
Most tartar begins there. Therefore this area deserves extra time.
Reduce Frequent Snacking
Constant eating feeds bacteria. Fewer snack cycles reduce plaque growth.
Drink More Water
Water helps rinse debris and dilute acids.
Use Targeted Plaque Disruption Tools
Precision cleaning tools reach grooves and edges better. As a result, plaque cannot mature into tartar easily.
Daily disruption stops mineral hardening.
Common Mistakes During Tartar Removal Attempts
Many people create new problems while trying to remove tartar.
Avoid these mistakes:
scraping with metal household objects
using needles or pins
forcing sharp tools under gums
brushing with excessive pressure
ignoring bleeding gums
These actions can injure tissue and expose roots.
Gentle and controlled always beats aggressive and rushed.
Small tartar buildup starts with missed plaque zones.
Daily precision cleaning helps break plaque before it hardens into stubborn tartar deposits.
👉Check Dental Pro 7 availability for targeted plaque control support
FAQ – Remove Hardened Tartar Safely
Can hardened tartar be removed naturally?
No natural rinse dissolves bonded tartar safely. Mechanical removal works best.
Is it safe to scrape tartar yourself?
Only minor deposits with proper tools and gentle technique are safe to try.
Does electric brushing remove tartar?
Electric brushes help prevent tartar but cannot remove thick hardened layers.
How often should tartar be professionally removed?
Most people benefit from cleaning every six months, sometimes sooner.